In first part of HTML for beginner series you learned how to get started with HTML, we created our first HTML document. In first article you learned about basic HTML markup and two tags, First tag was h1 for heading level and second tag was p tag for paragraphs.
h1 tag is used for heading level 1, it is most commonly used for most important heading e.g Heading of article. There are 6 level headings in HTML. In this article you will learn all the headings tags, paragraphs, making text bold and italic and why you should use Code editors to write HTML mark up.
Free and Premium Code Editors
But before we learn more about all the necessary HTML tags, lets discuss about HTML editors or more commonly known as text editors. There are so many free and premium code editors are available. You can start with free code editors, as a beginners you don’t need to buy a premium code editors which offers advance features.
There are some very popular code editors available and they are free or offer unlimited free trial. I personally use Brackets and SublimeText editor. Brackets is a free code editor from Adobe. Sublime Text is not free but offers unlimted free trial. I prefer SublimeText but Brackets is also great free code editor.
Why You should use Code Editors note simple NotePad
The short and simple answer is Code Editors makes writing Code (HTML, CSS, JavaScript, PHP etc) very simple and easy. Color coding, auto tag completion, error reporting are few features of Code Editors. If you will make any mistake while writing code, most code editors will show you errors.
You can write code really fast with code editors and their are so many awesome free addons/extensions are also available for Code Editors that makes writing code much simple, fast and easy.
For example i am a big fan of Emmet plugin which allows you to write code really fast. Just type an small abbreviation hit tab and bang Emmet will turn your small abbreviation into complete long HTML mark up.
I have published a video course Faster Workflow with Emmet and Bootstrap on Udemy. More than 7000 students have joined Emmet court, go and join this course i promise after watching this video course you will never ignore Emmet and text editors.
Download Brackets or SublimeText editor and install Emmet
Before we start writing HTML go and download and install any one of these two code editors.
Download SublimeText Code Editor
Download Free Brackets code editor
How To Install Emmet In SublimeText 2 3 & Brackets + Cheat Sheet
Headings, Paragraphs, Lists in HTML
Now create a new folder on your desktop and name it Learn HTML. drag and drop this Learn HTML folder in your code editor’s (Brackets or SublimeText) sidebar. Right click on folder name and select new file to create a new HTML document. Save this file as index.html.
If you have installed Emmet in your Code editor than type ! and hit tab to generate basic HTML mark up for your new page.
Edit title of this new page to something appropriate and descriptive e.g. HTML Elements. Downloadable files are available at the end of this article.
Headings in HTML
Headings are very important part of any document. For example when you are writing an article or blog post, you give it a title, in my case the title of this article is HTML for beginner : Paragraphs, Lists & Headings.
As you can see this main heading is clearly visible and has a large font size. I have used <h1> </h1> tag for this main heading. H1 stands for heading level 1. There are 6 elements for headings in HTML from h1 to h6. H1 is used for most important heading on any HTML document.
For second most important heading or sub heading after main title/heading you should use h2 tag. Here are examples of all HTML headings with text.
HTML Code
<h1>This is heading level 1</h1>
<h2>this is heading level 2</h2>
<h3>this is heading level 3</h3>
<h4>this is heading level 4</h4>
<h5>this is heading level 5</h5>
<h6>this is heading level 6</h6>
HTML result in browser
This is heading level 1
this is heading level 2
this is heading level 3
this is heading level 4
this is heading level 5
this is heading level 6
As you can see heading 1 has a large font size while h6 is smallest font size. h1, h2, h3 and h4 are most commonly used headings. Remember when creating HTML documents always use h1 for most important text e.g. for article heading use h1.
Best way to learn HTML tags: View Source code
For subheadings in a blog post/article you can use h2 tags, For sidebar titles/headings you can use h3 or h4 tags. The best way to learn how to use headings and any other HTML tag is always see source code of HTML pages when visiting popular websites and blogs.
Try to understand what tags they have used headings, text and other elements on webpages. right click and select view source or inspect element in chrome and Firefox to see source code (HTML and CSS code) of any webpage.
Paragraphs in HTML
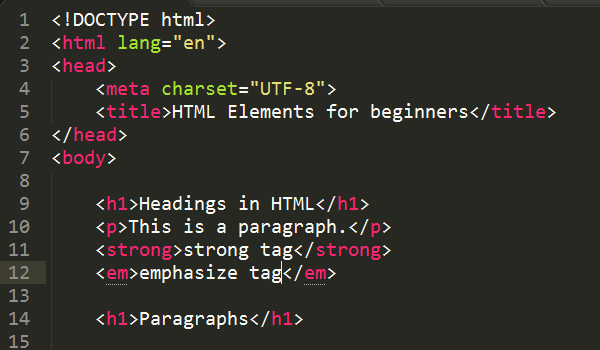
Now you know how to use headings in HTML document, lets learn about <p> <p> tags and how to use them. With Paragraphs you can make your text scanable and easy to read. It is not easy to read a long article or single paragraph. The HTML <p> element (or HTML Paragraph Element) represents a paragraph of text
You are reading this article and have you notices that it is easy to read and there are multiple small paragraphs. I have used <p> <p> tags. It is a good practice to these paragraphs tags when you are writing long and articles.
Make it easy for your reader to scan and read your content. You can write a single 5000 word article without using any p tags but it won’t be easy for readers to read text. Use p tag after 4 or 5 lines of text.
Here are example of HTML mark up and how browser (Chrome, Firefox, Safari etc) will render the page.
HTML code
<p>This is a small paragraph.</p>

<p>This is a long paragraph with more dummy text. Lorem ipsum dolor sit amet, consectetur adipisicing elit. Facere nulla, ea doloremque tenetur quidem odit repellat!</p>
How browser will display page.
This is a small paragraph.
This is a long paragraph with more dummy text. Lorem ipsum dolor sit amet, consectetur adipisicing elit. Facere nulla, ea doloremque tenetur quidem odit repellat!
I have created 2 paragraphs, first one is small single line and second one is bit long paragraph. As you can see it is simple and easy to use these HTML tags.
Making text Bold or italic
Sometimes we want to make few words bold or italic to make them stand out and more visible in a paragraphs. If you have used Microsoft Word you might already know that. There are two HTML elements em and strong.
HTML em element
According to MDN network The HTML <em> element (or HTML Emphasis Element) marks text that has stress emphasis. The <em> element can be nested, with each level of nesting indicating a greater degree of emphasis. Typically HTML em element is displayed in italic type. However, it should not be used simply to apply italic styling.
HTML mark up
<p>This is a <em>small</em> paragraph.</p>
Result
This is a small paragraph.
HTML strong element
The HTML Strong Element (<strong>) is used to give text strong importance, and strong text is typically displayed in bold. You need to wrap your important text in <strong></strong> tags. Here is an example.
HTML mark up
<p>This is a <strong>important</strong> paragraph.</p>
Result
This is a important paragraph.
In above example you can see the two words small and important are wrapper with em and strong tags.
Wrap up
In this article you have learned all about headings, paragraphs, em and strong elements. Now just give it a try, create a new HTML document, use these tags to wrap text with h1, h2, h3, p, em and strong elements. View your final HTML webpage in browser.
Keep learning. If you are looking for specific HTML, CSS or Bootstrap articles, add your comments below i will try to publish articles as soon as possible.
Leave a Reply